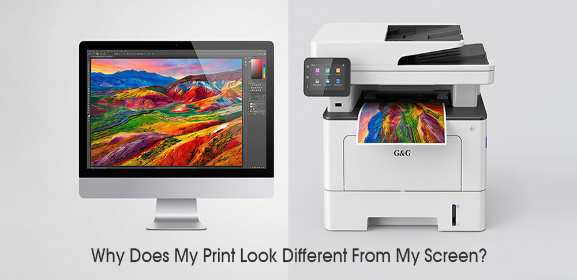
You're not alone if you feel disappointed when your photo prints don't match the vibrant images on your screen. Many people struggle with colors that look off, images that appear too dark, or details that seem blurry.
With the right knowledge and a bit of practice, you can consistently create best quality photo prints right from your home or small office. This guide will walk you through simple, effective tips to transform your digital memories into beautiful physical copies without breaking the bank.
What Equipment Do You Need?
Getting started with home photo printing requires something essential.
First, you need a reliable photo printer. For the best photo printer experience, look for models designed specifically for photo printing, often inkjet types that offer a wide color range and high resolution. Your choice between dye-based inks and pigment-based inks will influence your results.
Don’t skimp on paper—high-quality photo prints demand paper that complements your ink type. Glossy, matte, and satin are common finishes, each giving a different feel to your images.
If you ever need to print documents or want versatility, a G&G color laser printer can be a good addition for text and graphics, but for photos, a dedicated photo printer is your best bet.

How to Choose the Printer Settings for the Best Photo Quality?
Once your equipment is ready, dialing in the right settings is crucial. Always choose the highest quality print setting your home photo printer offers; this might be labeled "Best" or "Photo" mode. This mode uses more ink or toner and takes longer but delivers sharper details and richer colors. Tell your printer what type of paper you’re using—whether it's glossy, matte, or something else. This helps the printer lay down the ink correctly.
For color control, you can often let your printer handle it, but for more accuracy, especially if you’ve calibrated your monitor, using your software’s color management can yield better results. Don’t forget to check the resolution! For most common photo print sizes like 4x6 or 5x7, your image should have a resolution of at least 300 dpi to avoid looking pixelated. If you’re creating collage photo prints or need custom size photo prints, ensure each image segment meets this resolution requirement.
Coming Out Too Dark? 5 Tips for Print High-Quality Photos at Home
Frustrated when your photo prints turn out darker than expected? This common issue is often due to a mismatch between your screen and printer. Here are five straightforward tips to overcome this and other challenges for high-quality results:
Calibrate Your Monitor: This is the most important step. Your screen might be too bright, making images look lighter than they will print. Adjust your monitor’s brightness to a more realistic level for better accuracy.
Do Test Prints: Before printing a large batch or a final version, always print a small test strip. This helps you check for color accuracy, darkness, and overall look without wasting paper and ink.
Edit for Print, Not Screen: Images often need a bit more brightness and contrast for print than they do for screen viewing. Don’t be afraid to make slight adjustments to your photos specifically for printing.
Choose the Right Paper Settings: In your printer dialog, always select the exact type of paper you are using. Telling the printer you're using glossy paper when you are actually using matte can lead to poor ink application and dark results.
Handle with Care and Allow Dry Time: Fresh photo prints are wet and can smudge easily. Give them enough time to dry completely before you handle them. This also helps the colors to set properly and prevents dark, smudged areas.
Printing your own photos at home can be a rewarding and cost-effective way to preserve memories, create art for your walls, or even handle practical tasks like passport photo print.
It might seem tricky at first, but with the right home photo printer, a bit of patience, and these simple tips, you’ll be well on your way to producing best quality photo prints that you can be proud of. So, start experimenting, learn from each print, and soon you'll be enjoying beautiful, professional-looking photos from the comfort of your home or small office.